OpenClaw 설치 가이드: Lume 기반 macOS 가상화
OpenClaw 설치 가이드: Lume 기반 macOS 가상화
개요
요즘 유명한 OpenClaw를 뒤늦게 설치하려고 하는데 개별 PC를 준비하고 싶지는 않아서 Docker로 설치하려다가 Lume이라는 툴을 사용해서 구축하게 되었다.
Lume 소개
- Lume 공식 문서
- macOS, Linux VM 구성이 가능하다고 하는데 GeekNews 한국어 소개는 여기서 참고: GeekNews 소개글
설치 시작
환경: macOS Sequoia v15.7.3
참고 영상을 따라서 구성했습니다. 설치 스크립트는 여기를 참고하세요.
- Lume 설치
- 시간이 꽤 걸려서 거의 2시간 정도 소요됨
- Lume으로 macOS VM 실행
- 계정 생성하고
System Settings-Remote Login설정
- 계정 생성하고
- 로컬 PC에서 Lume VM으로 SSH 연결
brew설치- (Optional)
nvm설치
(openclaw설치 방법에 따라curl로도 가능해서 생략 가능) - OpenClaw 로컬 설치
- OpenClaw onboard 설정
(순서대로 API Key, Channel Token 등 입력)
- VM macOS에서 스크린 꺼져도 자동 잠자기 방지 기능 - 활성화
- 영상 10:22 부분 참고
lume run openclaw --no-display모드로 실행- (Optional) Lume 체크포인트 생성
트러블슈팅
gateway connect failed: Error: pairing required.- 글 작성 기준 2026년 2월부터 발생하는 이슈들로 비슷하게 많이 올라와 있는데, 여기서 해결법을 찾았다.
Docker로도 사실 해봤는데 포기한 이유가 이거였다. 권한 scope 관련 설정 문제 같았다. 나랑 비슷한 환경이였던 것 같다.
Environment: OpenClaw 2026.2.19-2 · macOS arm64 · Node 25.6.1 · gateway mode: local, bind: loopback
해결 방법 (Manual Fix)
~/.openclaw/devices/paired.json수정1
"scopes": ["operator.read", "operator.admin", "operator.approvals", "operator.pairing"]
~/.openclaw/identity/device-auth.json수정 (위와 동일)1
"scopes": ["operator.read", "operator.admin", "operator.approvals", "operator.pairing"]
- 게이트웨이 재시작
1
openclaw gateway restart
- openclaw 채팅 확인
1
openclaw tui
(p.s. 12시간도 안된 따끈따끈한 방법 덕에 겨우 설치했다.)
OpenClaw Channel 설정
- Slack - pairing(2026-02-27 updated)
내가 만든 봇에게 디엠을 보내는 경우 페어링이 필요하다.
다음 메시지로 정보랑 CLI를 알려주면 그대로 실행하면 된다.

2026-02-27 update: openclaw v2026.2.26 이후로 해당 PR - Closed 되어 해결됨
(기존에 개인 DM 외 public 채널에서 멘션시 응답이 안오는 문제) https://github.com/openclaw/openclaw/issues/21773 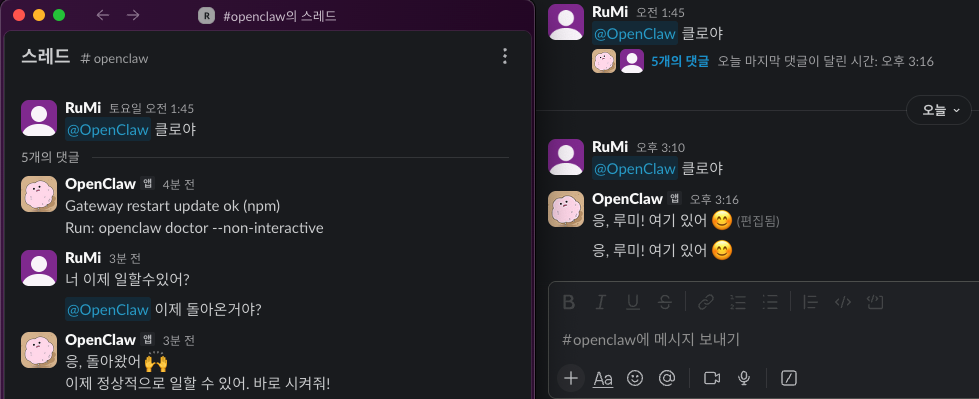
This post is licensed under CC BY 4.0 by the author.